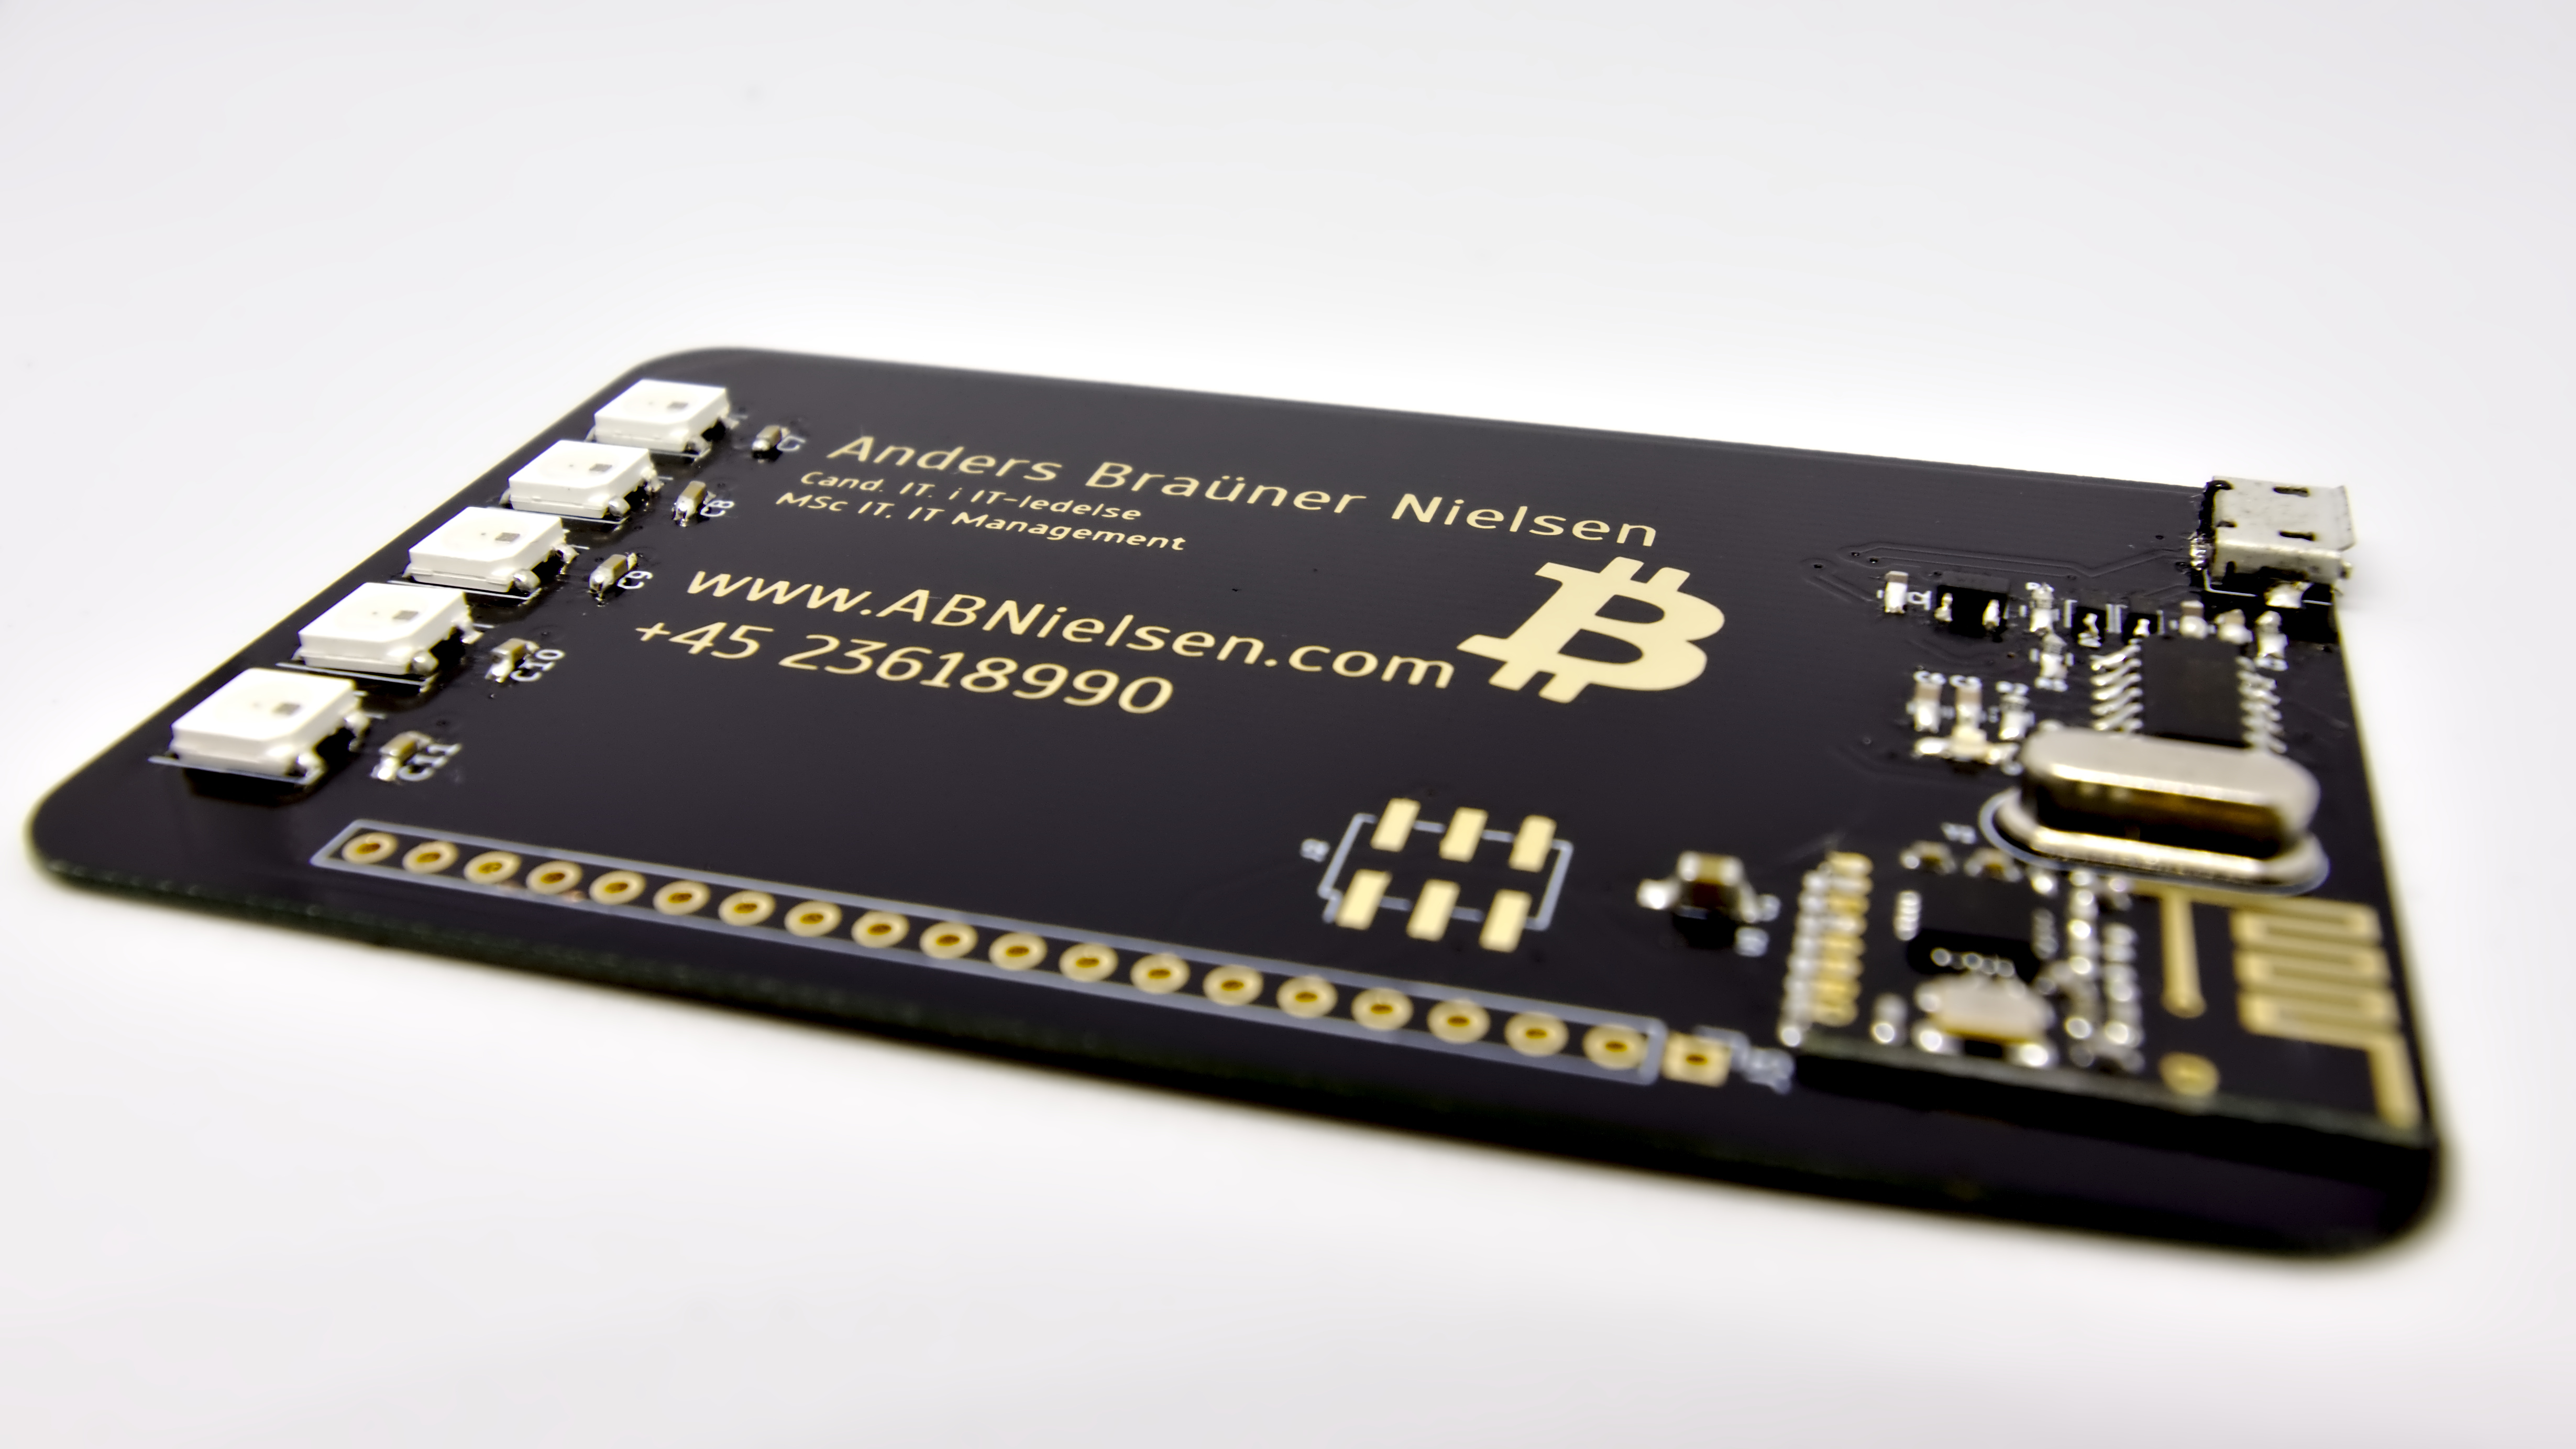
This is my business card. It works as a USB-HID device, takes input from a 2.4Ghz transceiver and it also comes with some flashy RGB LED’s and a prototyping header. Oh.. And it has my contact information.
Spoiler: This is also on Github if you just want to skip to code and PCB files. If you want to know more, read on.
Why?
After seeing a couple of PCB business cards on hackaday.com, I knew I had make my own. But how do I make it stand out? What should it do? How expensive can I get away with?
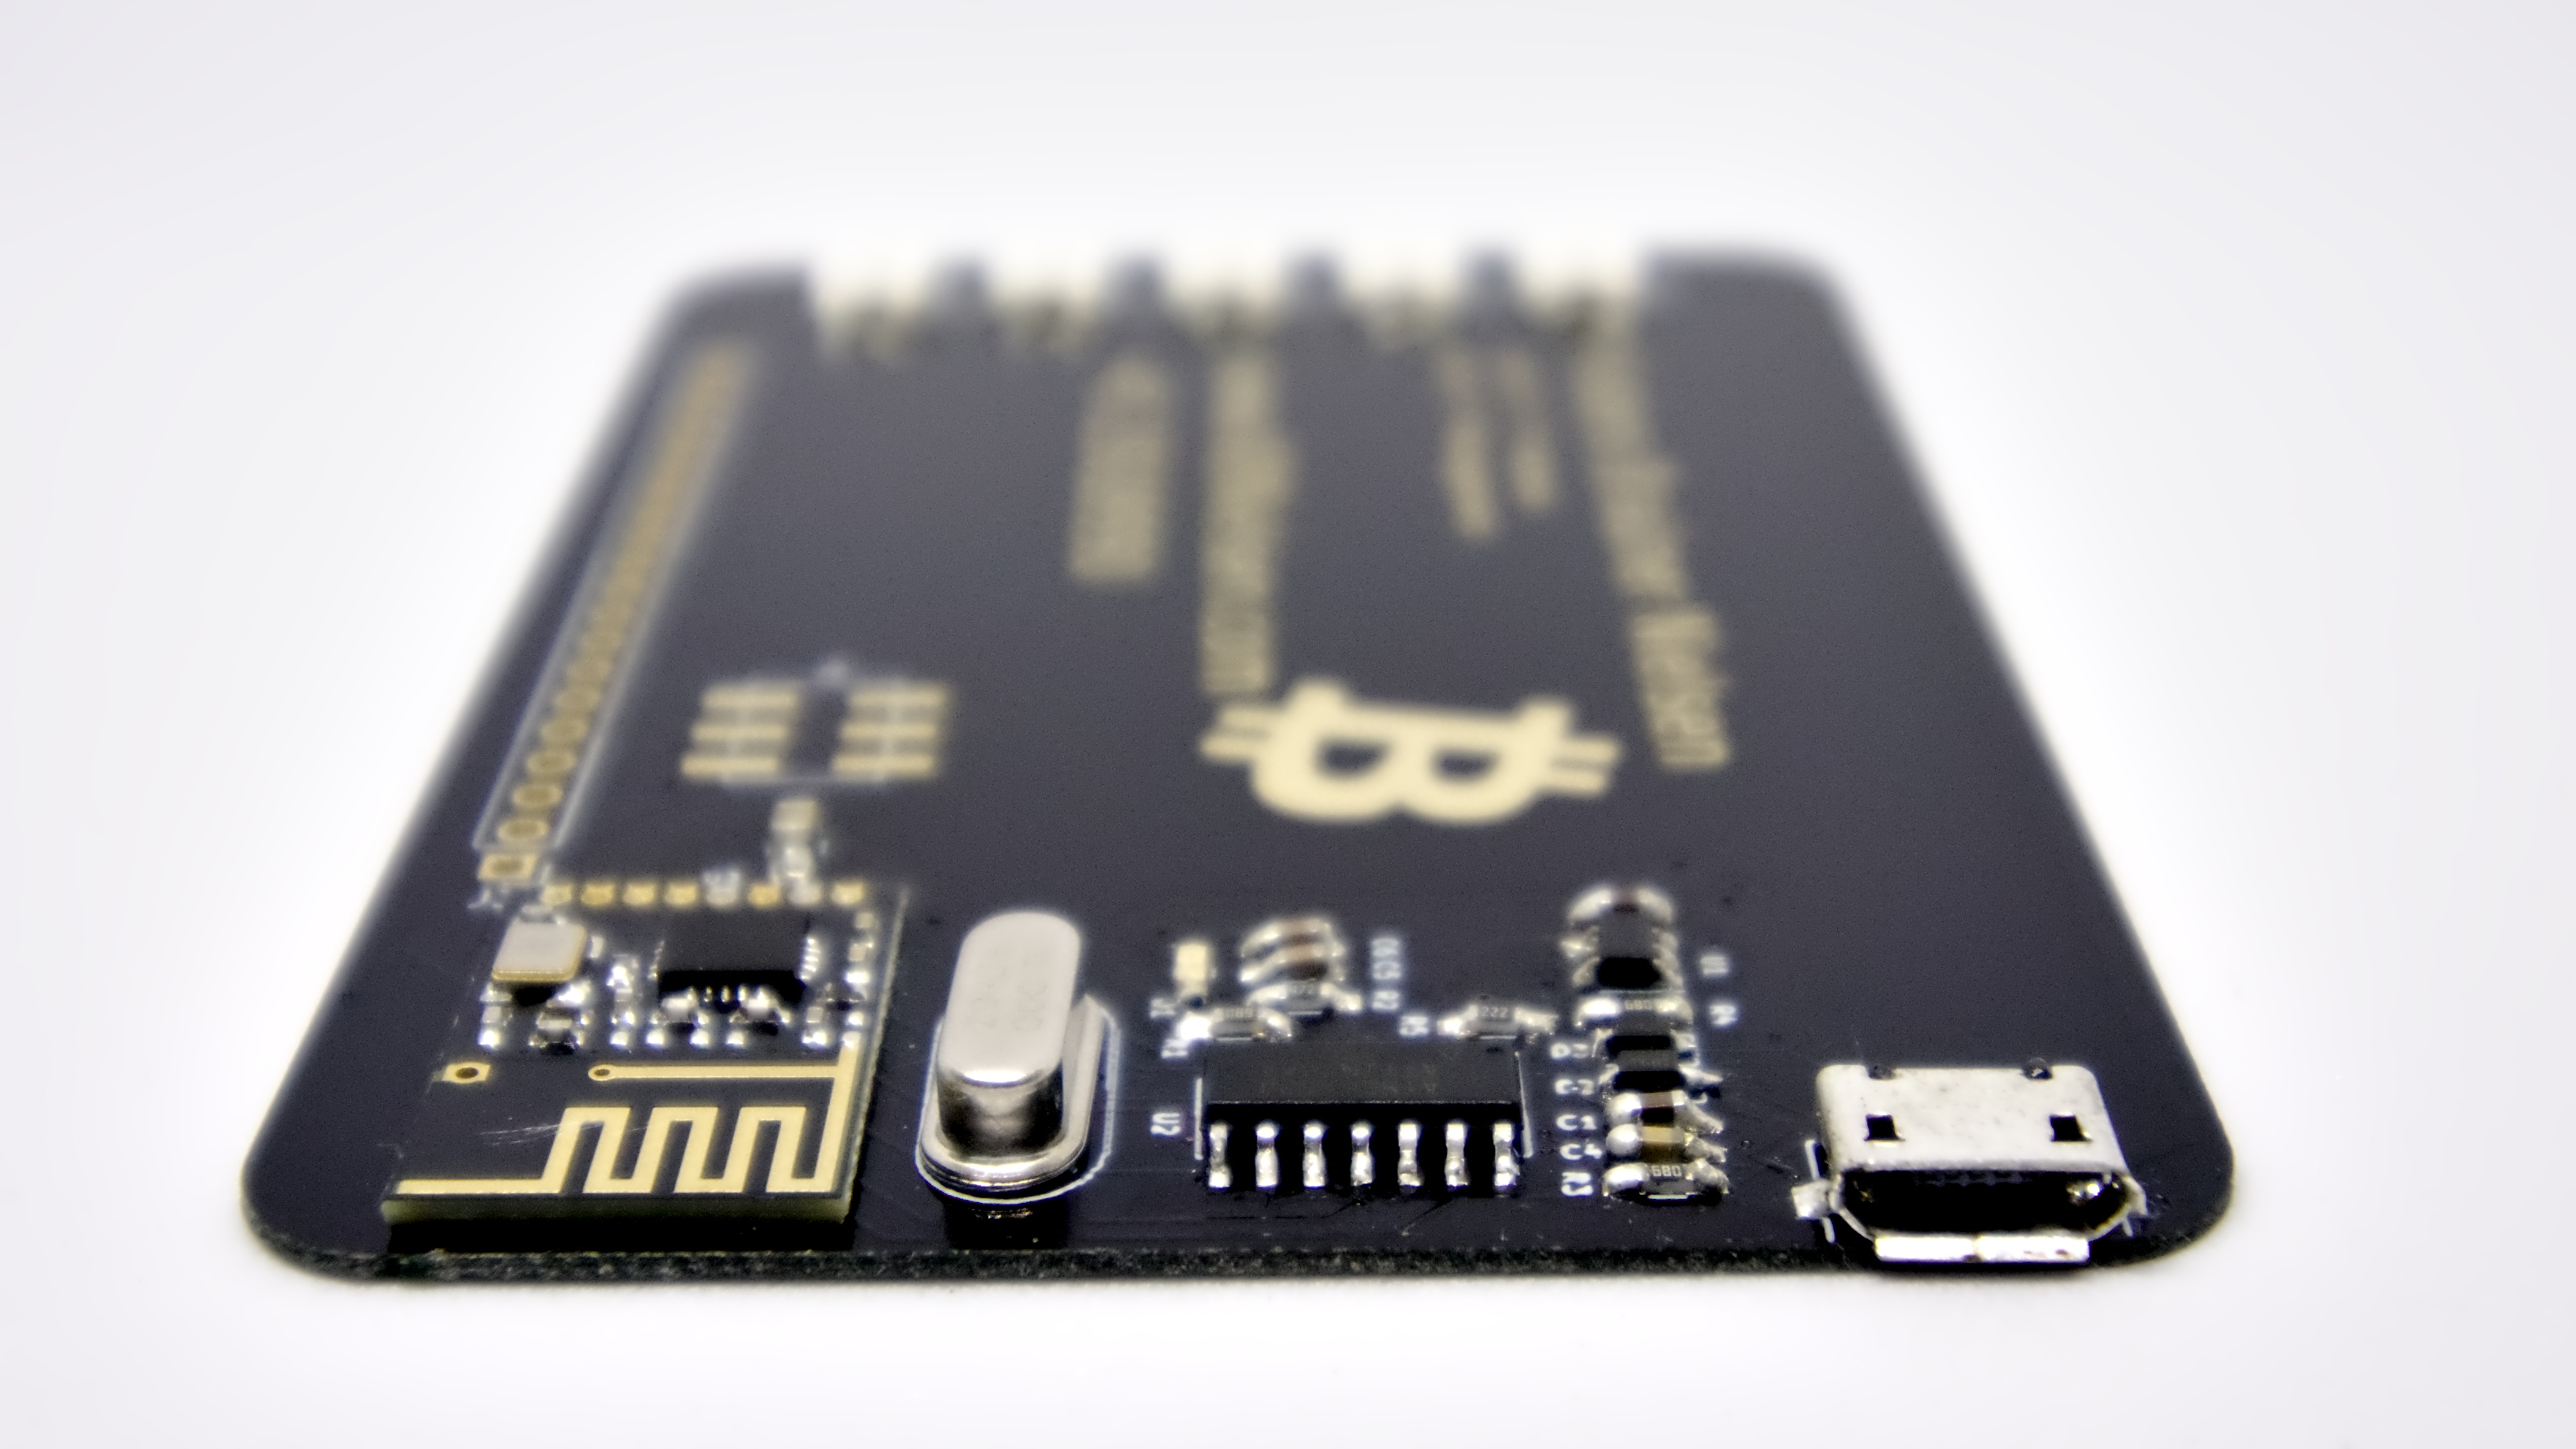
For this little project I decided to squeeze as much as possible out of a cheap ATTiny84. I chose the T84 because it’s dirt cheap (<1$), I’ve been through it’s datasheet more than just a few times, and I wanted to see exactly how much it’s possible to squeeze into the 8192 bytes available.
Turns out the answer is: A lot!
I have a lot of individually addressable RGB WS2812B’s LED’s – aka NeoPixels – spread around my home(and about 850 left on a reel) that I’ve been controlling with prototypes made up of ATMega32u4’s and ATMega328p’s with 2.4Ghz nRF24L01+ tranceivers and a Raspberry Pi with the same tranceiver so I can control it from my phone. To justify spending more than a few cents per business card you need it to actually do something useful. Controlling RGB-LED’s was a start.
Attiny84 √
WS2812B’s √
nRF24L01+ √ (though i suspect pretty much everything out of China is actually SI24r1)
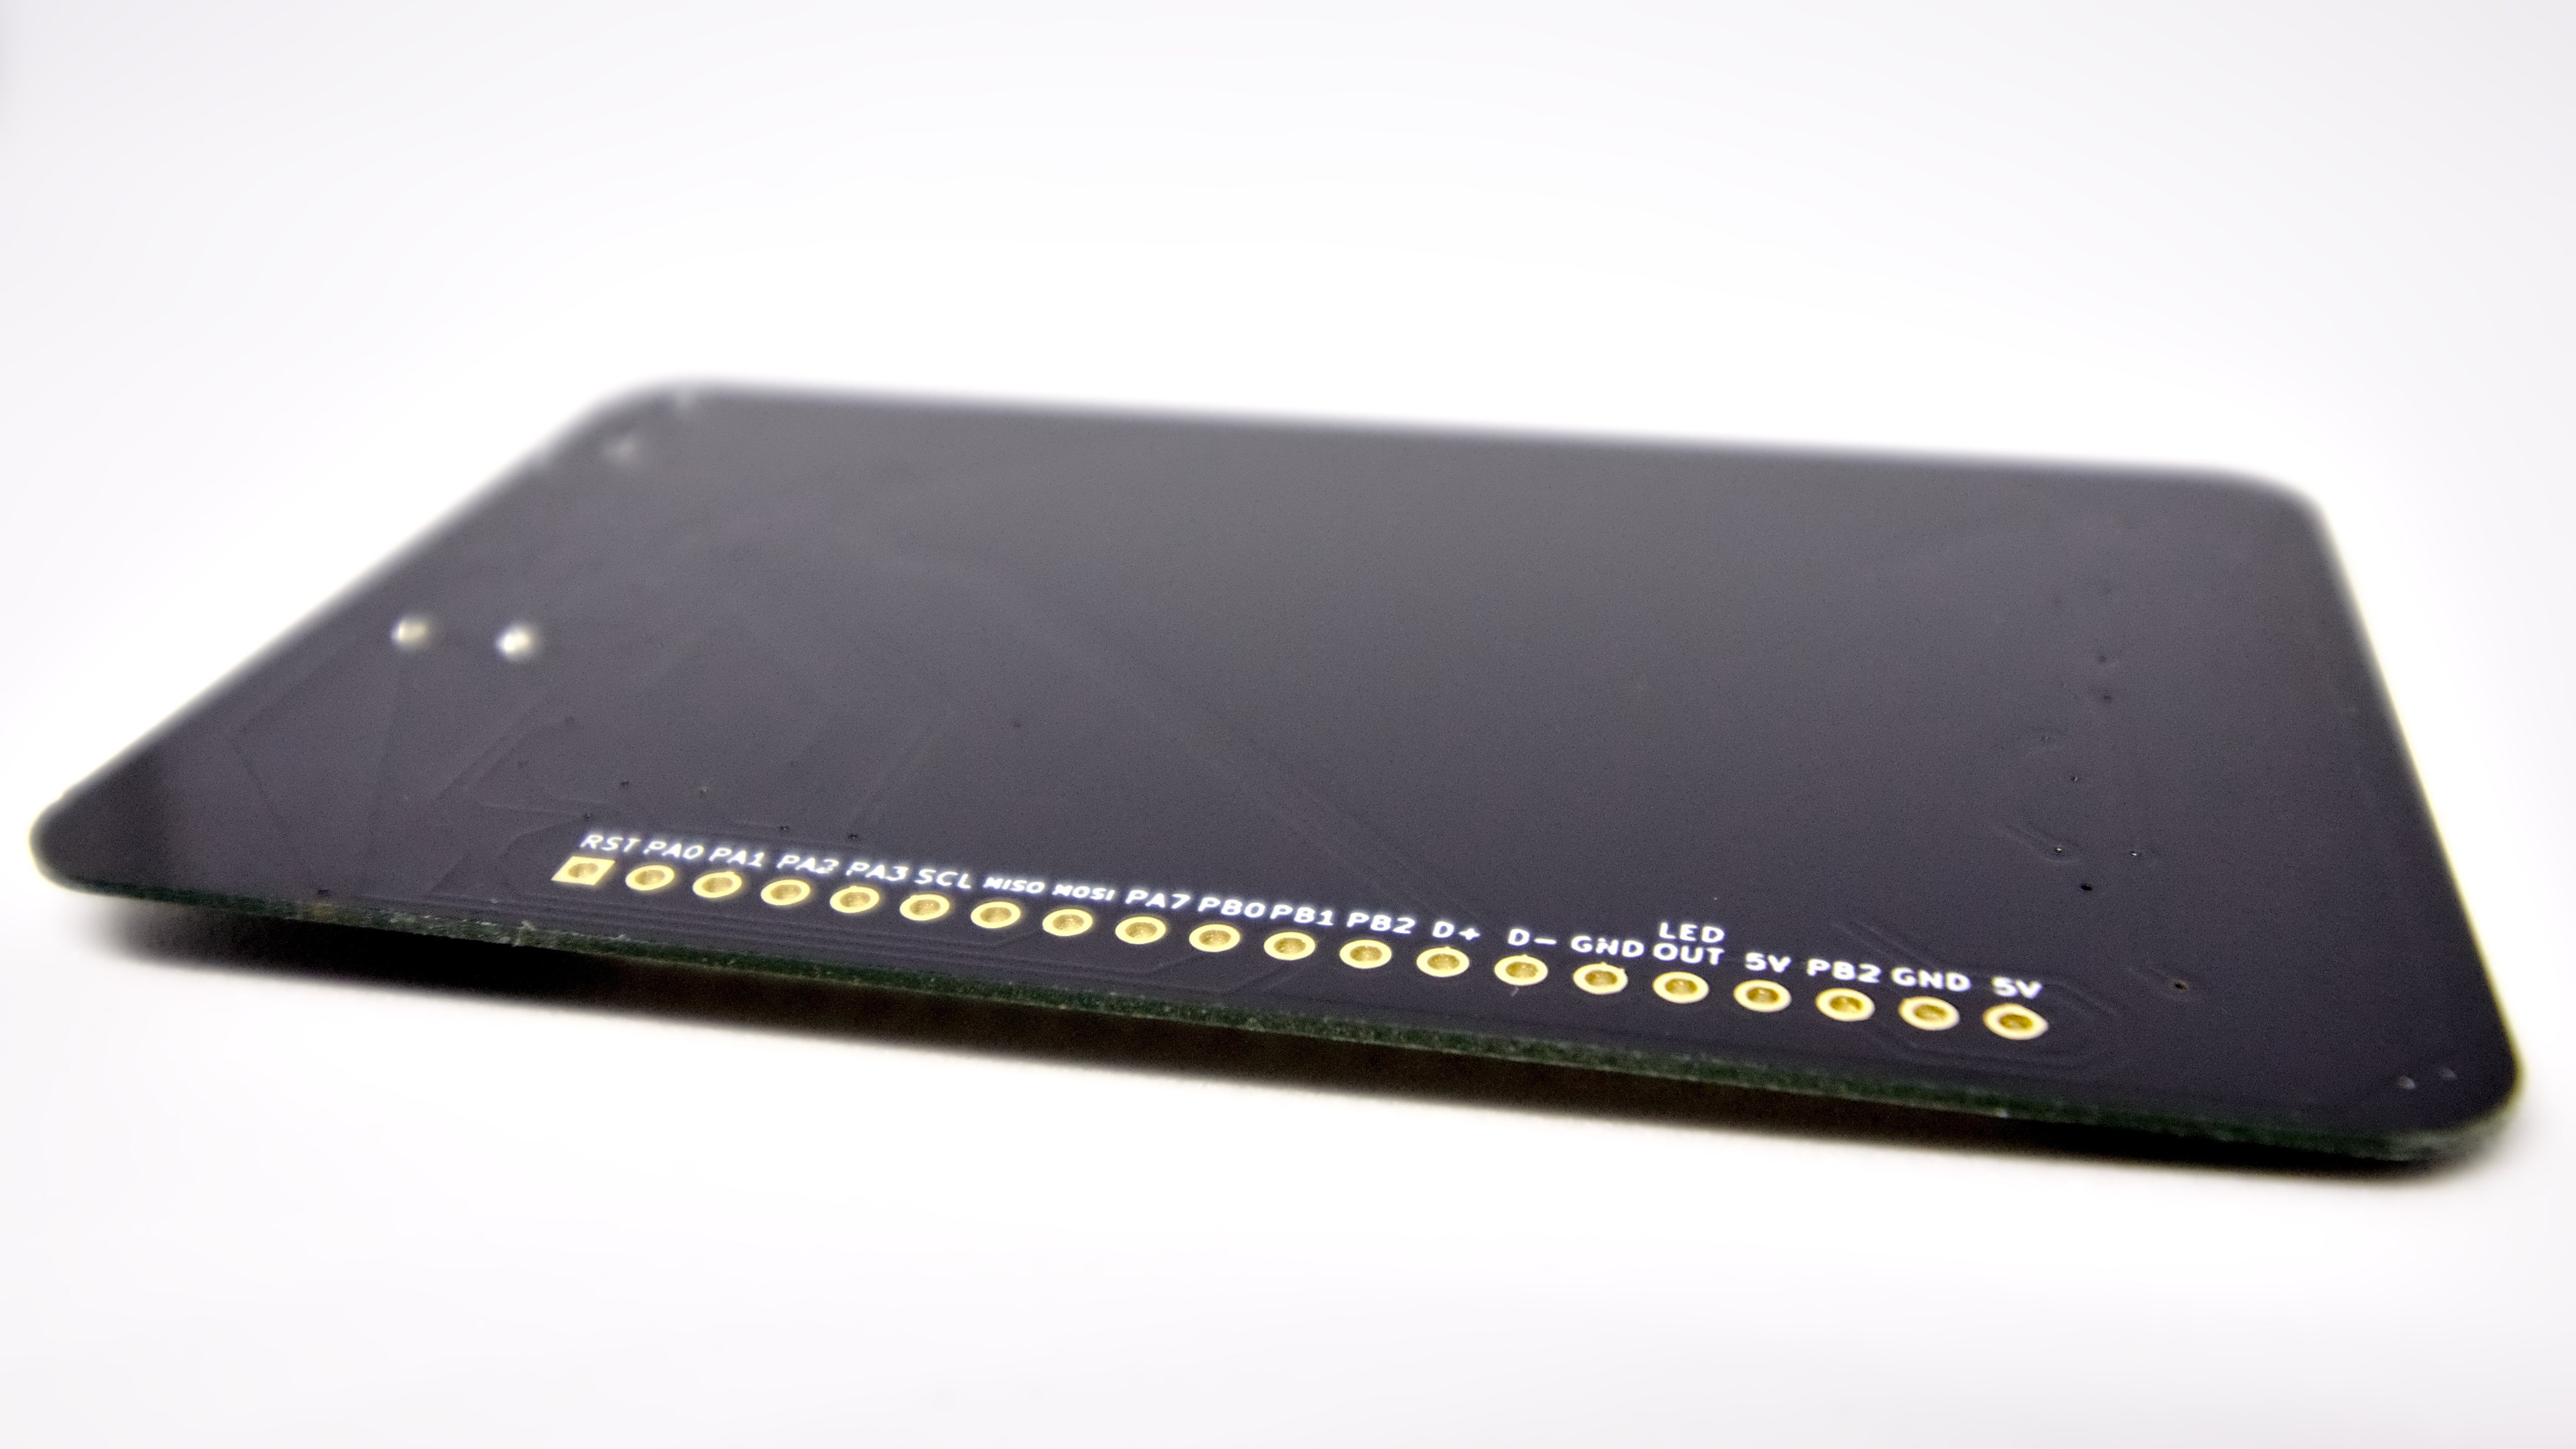 I also added a 20 pin header that makes it easy to use this board for prototyping with the 14pin ATTiny’s. Easy access to every pin(and a few extra power pins) means you can easily solder sensors etc. directly onto the pins – or add male header pins and push it into a breadboard.
How about USB?
One of my annoyances when designing prototypes has always been that it’s really hard to make anything USB-capable(not to speak of compliant) for less than 5$. It is possible though, if you don’t follow the usual path. OBDev’s V-USB (with a little bit of help from Adafruit’s TrinketHidCombo library) made it possible to squeeze some USB capability into this project without adding much more extra hardware than two zener’s and three resistors.
Software
I have to be honest. I like the Arduino IDE for prototyping. Slapping a couple of libraries together doesn’t usually result in the most efficient code but when you want to put something together that showcases a lot of features fast – as in: a few hours – the vast amount of libraries for interfacing with every popular IC makes it hard no to take the easy route.
Everything didn’t work straight out of the box though. The RF24 library needed pin definitions changed for the ATTiny84(since the USI’s DO/DI are reversed compared to MISO and MOSI and this hasn’t been fixed in the current version) and Adafruit’s TrinketHidCombo library also needed some tweaking to work with the T84. I also went with the Adafruit NeoPixel library for controlling the WS2812b’s, even though it’s relatively huge for a tiny chip, but somehow I managed to fit the basic functionality into the 8k of flash anyway. It does however, use every single byte available and the debug functions won’t fit unless something else is disabled.
I thought about using the smaller FAB_LED library for driving the LED’s to leave more space for HID-stuff, but it doesn’t really play nice with the 10ms USB-polling when controlling more than one LED at a time so I went the easy way with the NeoPixel library and limited the HID capability to just pressing media keys (start/pause, volume up, volume down and stop). I pride myself in making software that’s good enough for doing the job without too much “gold plating”.
So for now, all it does is work as a 2.4Ghz USB-dongle for media keys along with controlling flashy flashy LED’s. Pretty good for 5$, gold plated board included, though.
PCB Design
So h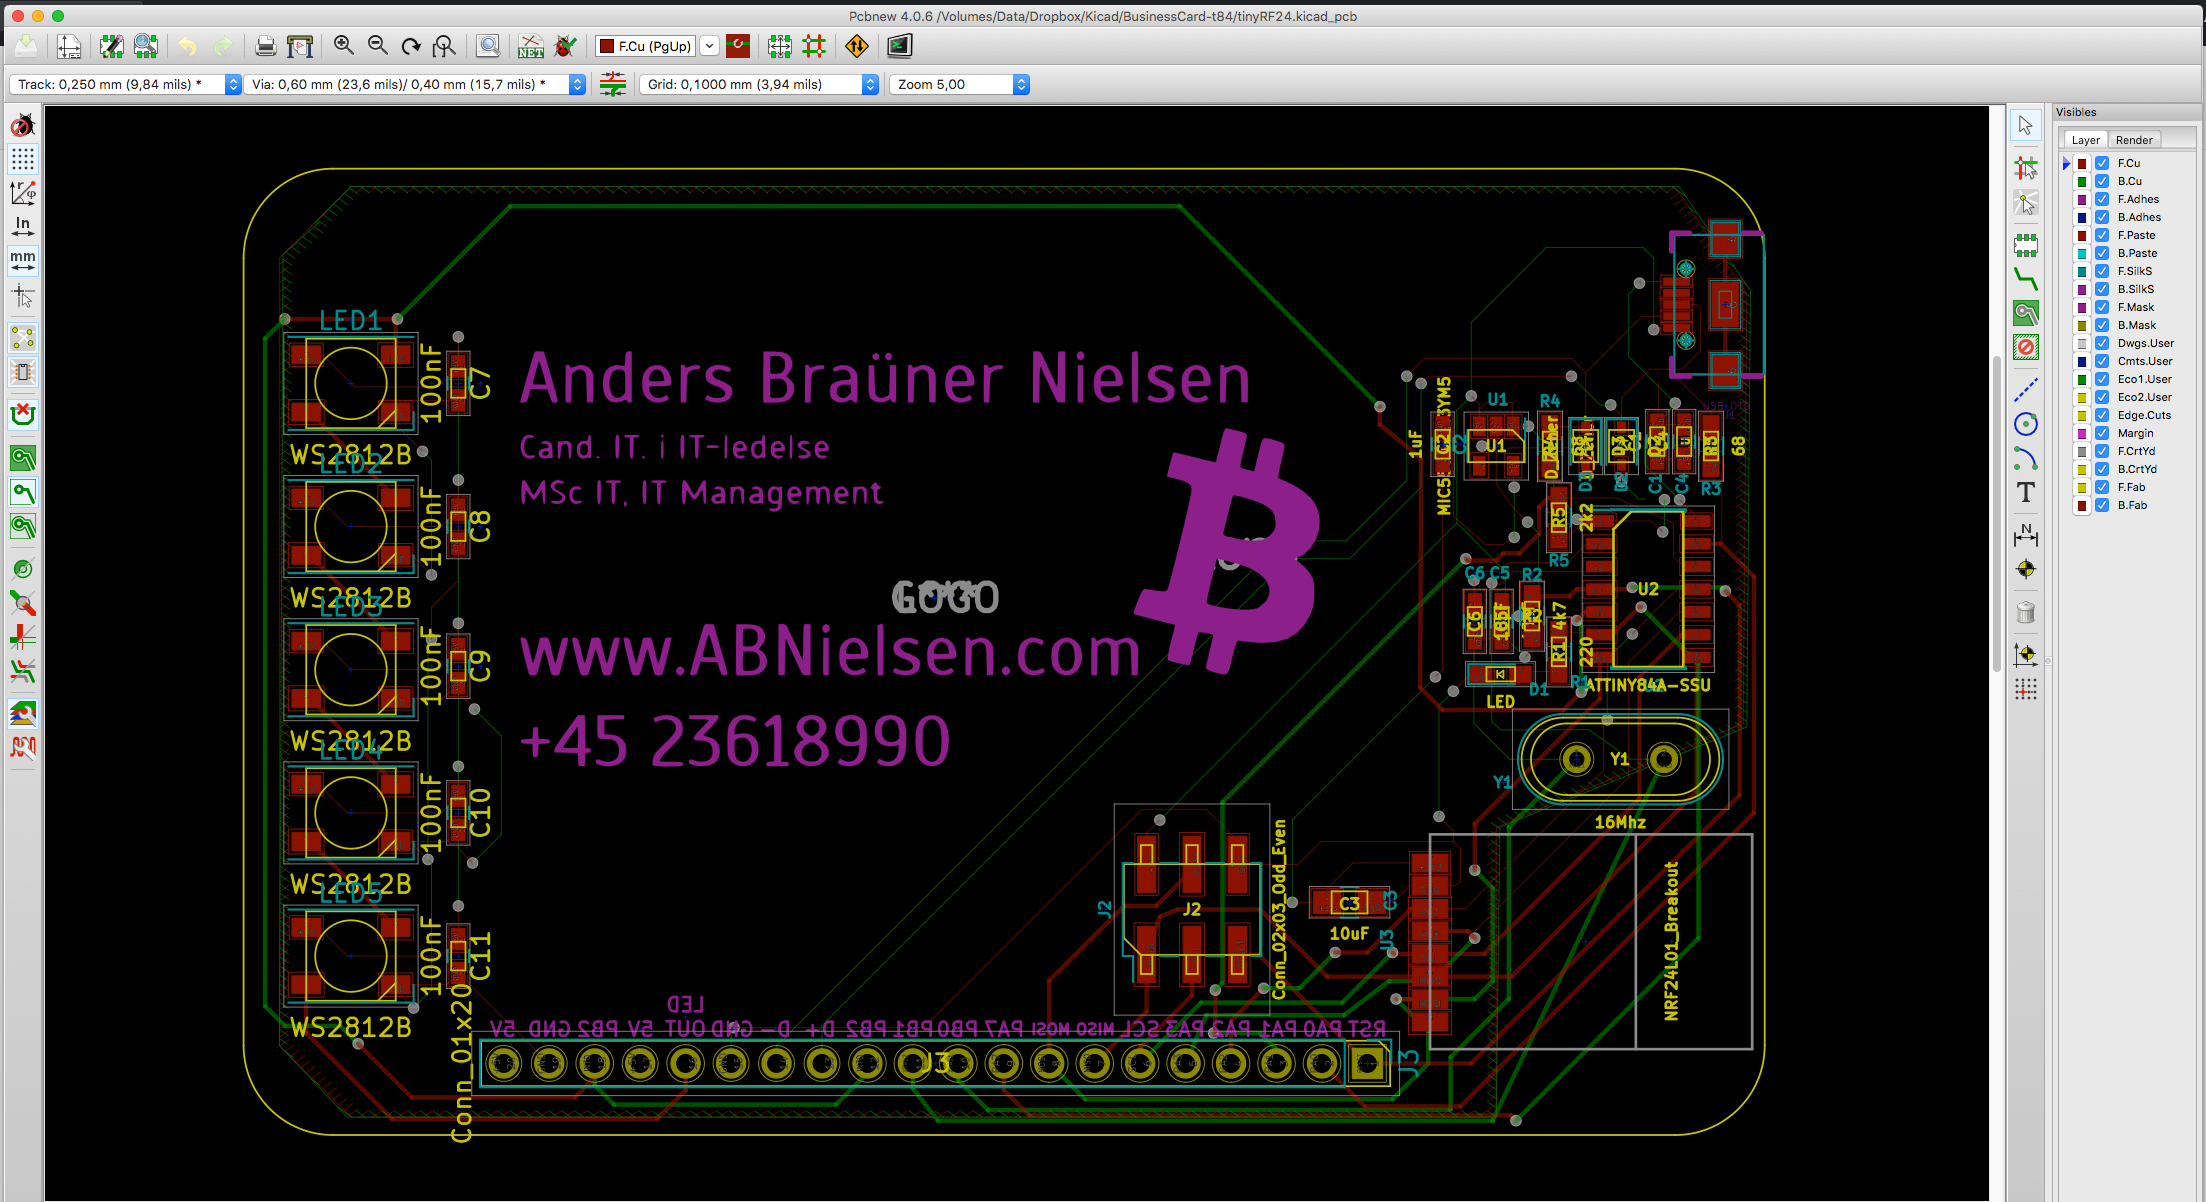 ow do you make a PCB business card look cool? The easy way to make it would’ve been some silkscreen text with contact information etc. but to me the typically low resolution silkscreen text wasn’t good enough so I went with making a big ground plane and putting the text and logo on the solder mask layer. The font in KiCAD isn’t my favourite either, so I went with making a footprint of the text from a bitmap instead.
For the surface plating I could’ve gone with the cheaper options but I really believe the immersion gold(ENIG) makes too much of a difference to skip.
I chose 0.8mm board thickness because it’s enough not to break unintentionally and also fits in a standard credit card slot of a wallet – without components that is.
How do you program it?
At first I thought I would just skip the programming interface and use a test probe clip(like this one from Pomona) to program it.
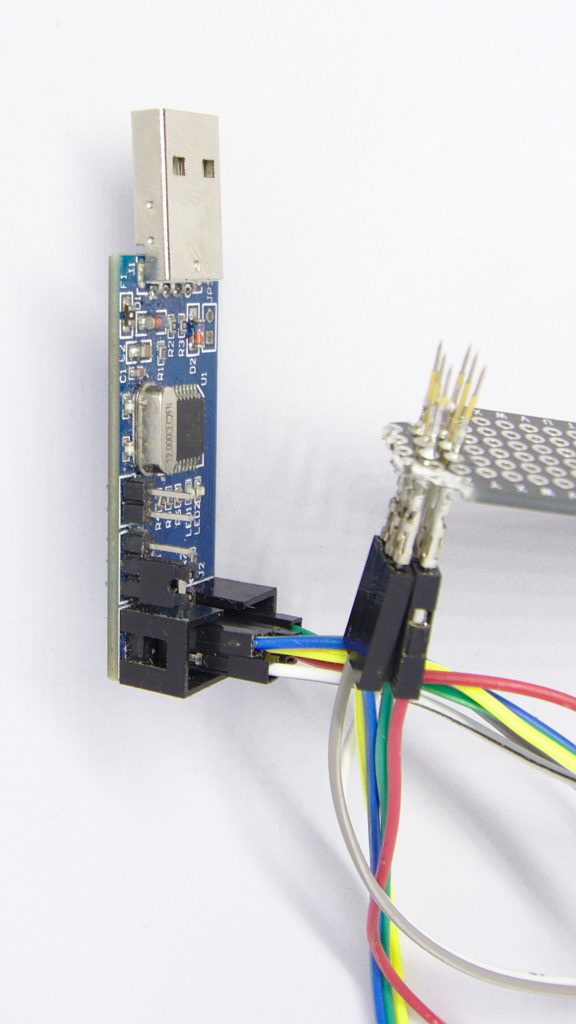
But since I have a feeling I will be using this as a protoboard many times, I decided to find a better solution. Of course I could just hold down jumper wires to the 20-pin header or solder them on – but in my opinion that would either be a hassle for fast prototyping or ruin the look.
Instead I decided to experiment a little bit with programming pads(J2 if you take a look at the schematic), since I already had some pogo pins on the way from China when I ordered this. I didn’t have exact specs for how big the pads needed to be, so I went with a footprint meant for an SMD male header. When I got the pogo pins I soldered them onto female dupont wire terminators and then onto a perfboard. You can see the final result on the right, together with my overused USBasp. This is a solution I can really recommend, but the next time I make an interface like this I will most likely just use tiny pads 2.54mm(.1″ standard header) apart and as small as possible. With the thickness of the solder mask, the pins slide right into place. The only downside is you need to apply a tiny bit of pressure while programming the device, but I prefer this to connecting jumper wires any day.
If you want to read more about this subject, take a look at my post about programming an AVR without taking up board space.
Want to make your own PCB Business card?
The point of a business card is to share it with other people, so I’ve uploaded this whole project to Github. Feel free to fork it and put your own spin on it.
Leave a comment if you have any questions, suggestions etc. Any feedback – good or bad – is very welcome 🙂
I love the idea, would be an awesome way to present a style and a business model to get the brain working. Very innovative!
This is really cool, great idea!