Arduino’s are usually just programmed via a USB to serial connection. While this is easy for beginners and makes prototyping easy, it stops pretty fast when you want to make your own hardware and want to make it cheap. Of course you could just burn a bootloader onto your chip before soldering it on, but this becomes problematic when your chip hardly has enough room for a bootloader – let’s say the ATTiny24.
I’m not saying I have the final answer as for what is right for you, but here are the ways I’ve tried and the experiences I’ve gathered.
1) Program your chip before soldering it in
When working with though hole IC’s it’s easy to program them on a breadboard before soldering them into your project(or a socket in your project) but when switching to SMD, this becomes a problem since sockets are no longer an option and this takes away the option to reprogram the chip without desoldering it.
Pros: Good for THT IC’s in sockets
Cons: Bad for SMD IC’s
2) Add an ISP-header to your project.
Since you’re reading this page and you haven’t turned away yet, you’ve probably seen the 6 pin ISCP header on the Arduino UNO. It’s the AVR for programming the ATMega328p directly, without using the bootloader and programming it over serial.
Pros: Easy to use, standard layout
Cons: Takes up board space and you’ll need to do extra soldering
3) Use a test probe clip

If you program the same kind of chip a lot, these clips are handy. You just connect jumper wires and clip it onto the IC. I have one of these for SOIC-14 and it worked great the first couple of times, but after a while I’d gotten the pins bent a bit and it got harder and harder to make a good connection.
Pros: Doesn’t take up board space, also good for testing
Cons: Not always easy to clip on correctly, wears out over time, not good when IC’s are hand soldered and might have excessive solder(like some of mine – whoops).
4) Pogo pins and pads or vias
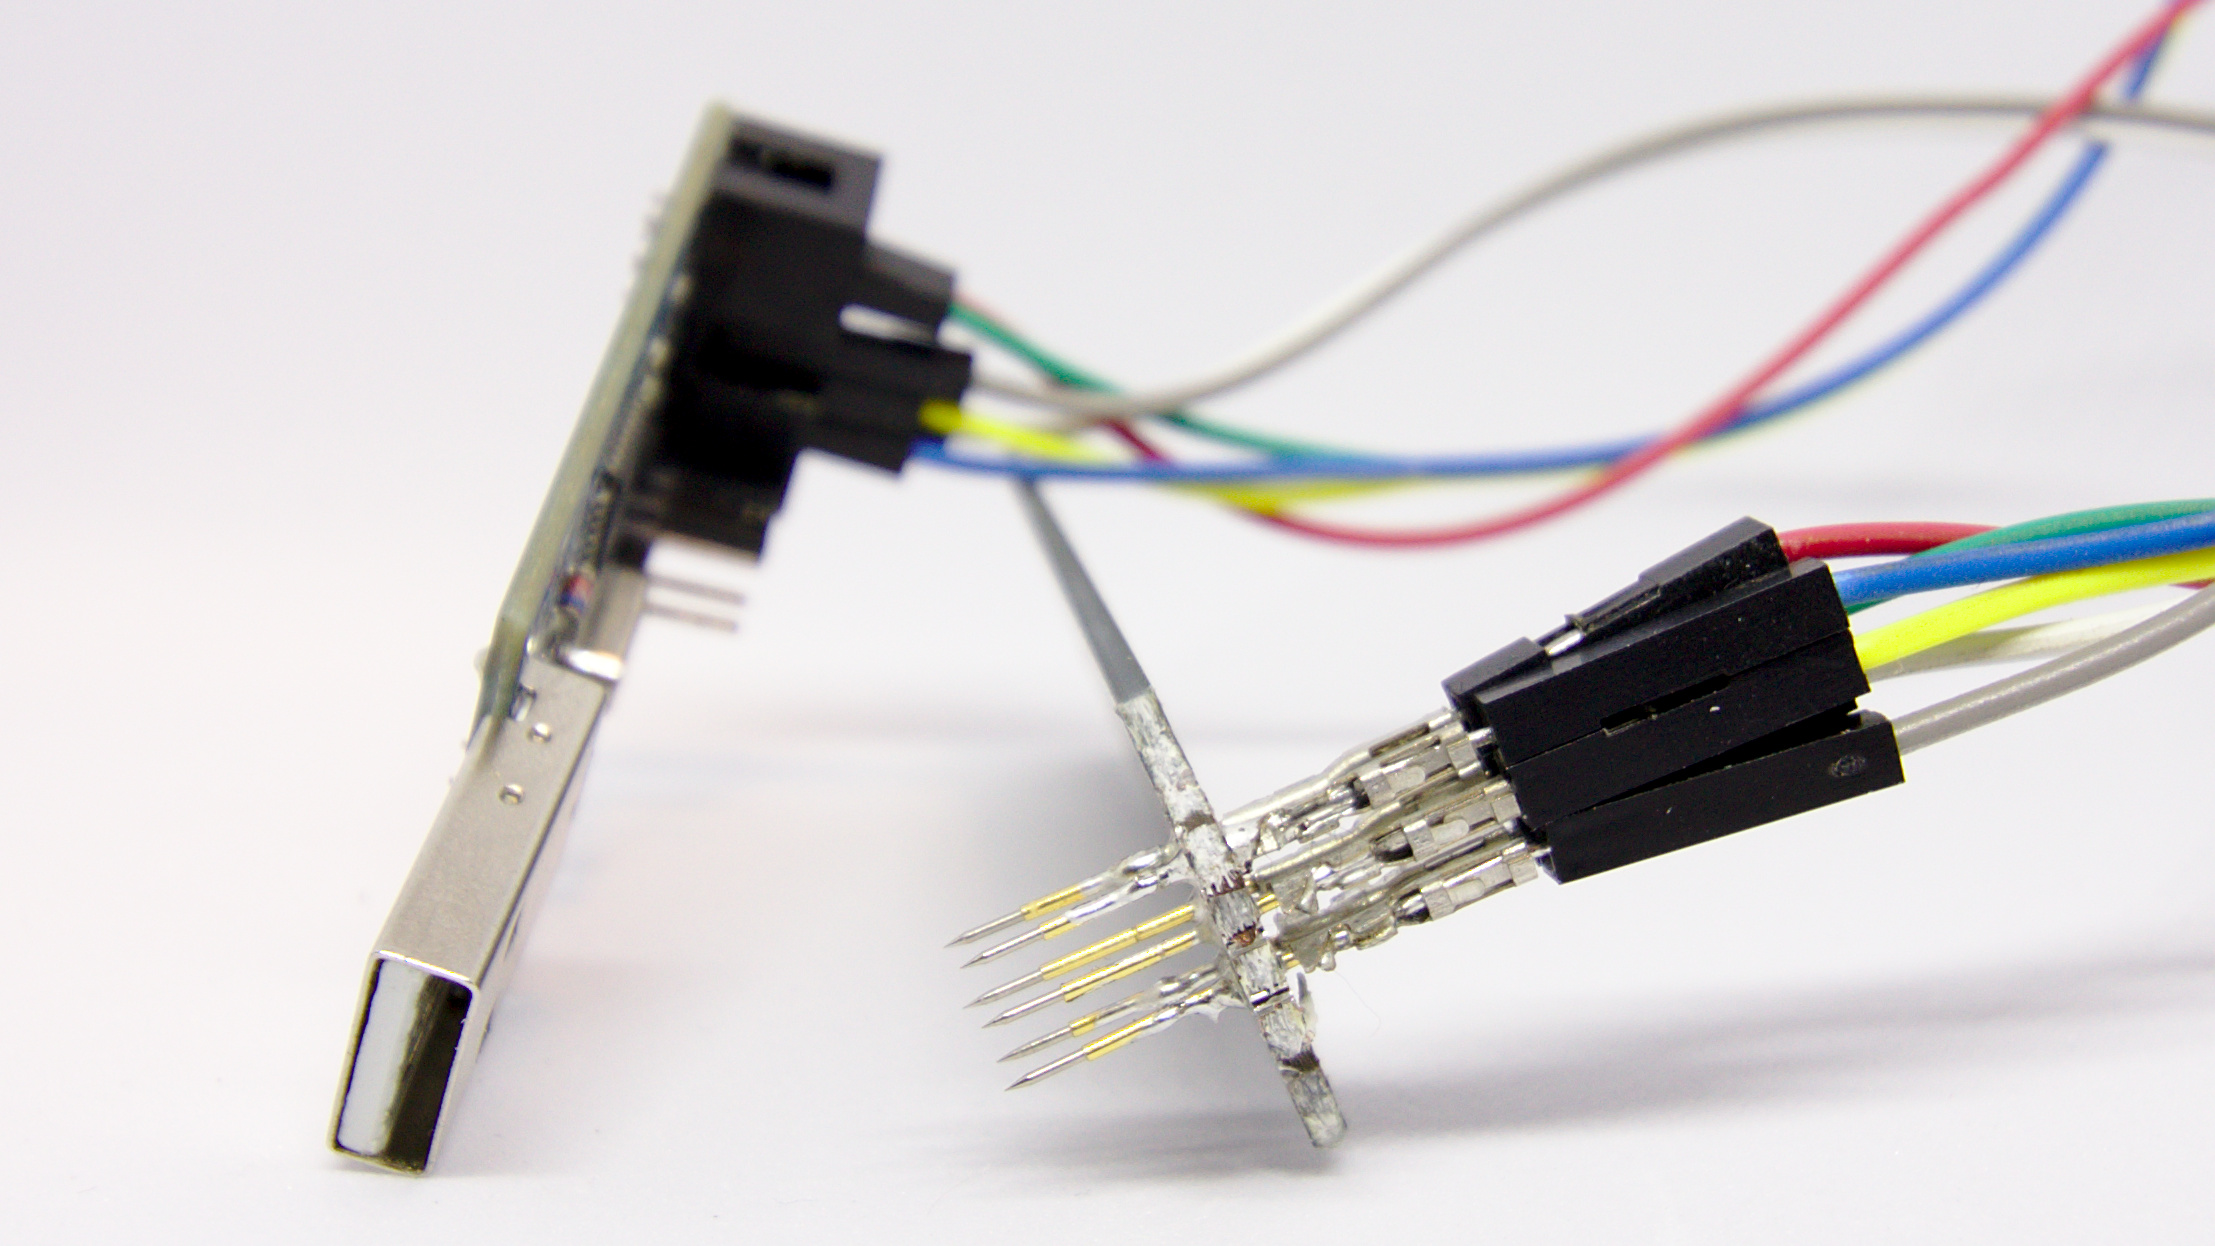
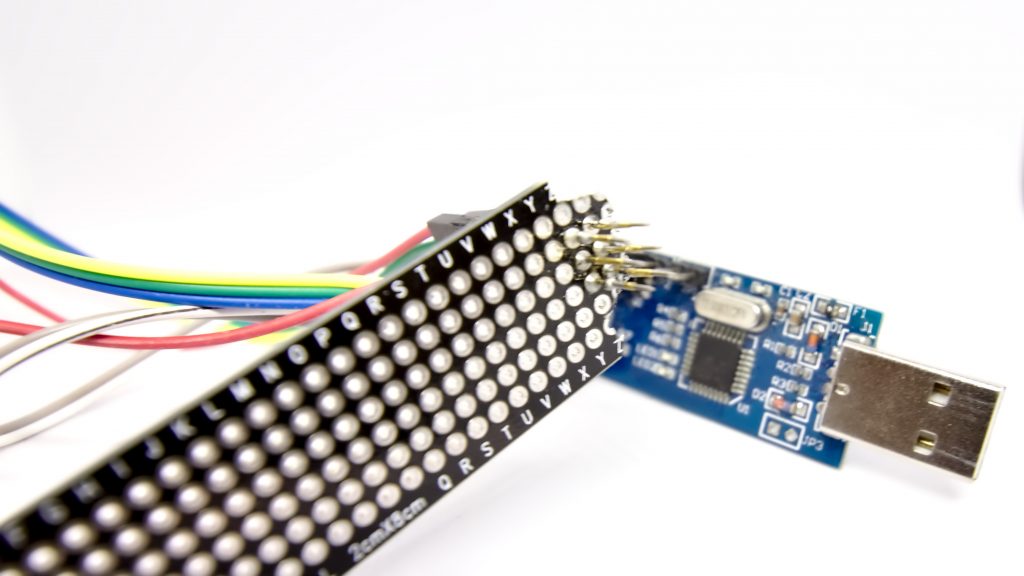
I saved my personal favourite for last. This is an alternative to the “bed of nails” method where you make another board that fits on top of your own and makes connections the right places.

These needlepoint pogo pins are easy to make a connection with, even if your programming pads are relatively small. I haven’t testet it, but I expect you could use this method with something as small as an uncovered via. The next time I design a board that needs to be programmed fast I will probably just make circular pads half a mm in diameter 2.54mm(.1″) apart, which means it will be easy to put traces or maybe even components between them.
Pros: Easy to connect, hardly takes up any board space
Cons: You have to hold the pins down while programming
For my PCB Business card I used this method and it works great – even though the ISP pads on the board are waaay bigger than they have to be. I simply soldered the pins onto female dupont jumper wire terminators and then soldered them into a perfboard. That way I have something to hold on to and the spacing between the pins is easy to get right.
Did I forget a smart way of programming an AVR? Questions? Please leave a comment.
One thought on “Programming an AVR without taking up board space”